The YouTube description box might be the most undervalued player on your video marketing team. Many brands, vloggers, business channels, and other less-formally produced channels will skip the description box as unnecessary or simply not worth the energy to optimize for every video. This could be killing your channel, Larry.
Truth is, the description box is a crucial player in your YouTube marketing strategy because its contents (along with your titles, tags, and captions) help YouTube to determine if and where your videos rank on search or as related videos. The html-ready box can also include clickable links which appear in search engine results. This is where you will optimize your video for maximum effectiveness and post links that will connect your viewers to your website, offers, and other online sources.
YouTube Description = Marketer’s Best ToolBox
There is a ton of lead generation that can take place in a good description. Unlike annotations, the links in your description box work across mobile and desktop platforms and while annotations only link to an associated website (and a few other limited options), a link in the description box can connect your viewers to bitly links, external websites, Amazon affiliate links, or all of the above. This ensures your viewers are able to connect with your products pages, optins and other content.
But dropping links in your description like a spammer in a gaming forum is not going to cut the mustard on the worlds largest video platform. You’ve got to add structure to the copy so your viewer can easily navigate the content. So let’s take a look at the 5 ways you can add value to your YouTube descriptions today.
5 Ways to Craft a Killer YouTube Description
For starters, the copy (or text) found inside your YouTube description box is indexed by search engines and is used by the search engines to rank your video accordingly. While it’s possible to rank on YouTube without a big description box, you would also be missing out on valuable watch time as many YouTubers scroll through a description box while the video is playing. You see how key that is, right? A smart YouTube plan will include a keyword optimized, structured description box with every video. At Videospot, we follow these general guidelines for creating exceptional description copy:
#1 Make the First 5 Lines Count:
On the upload page, you’ll have your first opportunity to add a description box to a new video. You can always add this later but ideally, your description should be written before the video is made public. The first 5 lines are essential for two reasons:
- The first two lines of the description box are displayed next to your video in search and when posted on social media.
- The first 5 lines of the description are included beneath your video but above the “read more” tab.
Your should first and foremost have a link to your free offer or lead magnet and then a keyword optimized description of what your video is about. We tend to include related keywords (also called LSI keywords) to provide more context around the keywords. This is ideal for videos where specificity is need to assist the video in ranking for the right terms.

#2 Always Include HTML Links
Always include a link to your optin or website in the first two lines. Beyond that, the description box should be an index to related content- not a museum for every web link where you’ve ever had an affiliate account. Be judicious in how many links you post.
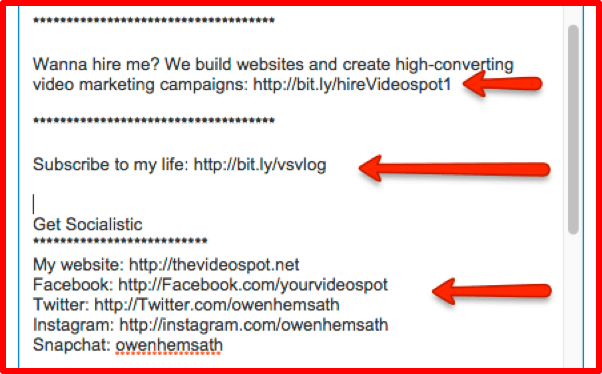
Where you put these links may vary based on your preference or personal testing but your description box should always include links to connect with you on related social media sites. You must use a full URL in order for the link to be clickable (in other words, use http://). See the example below:

I’ve seen great description boxes from YouTubers which include Amazon affiliate links to products mentioned in the video but also links to the gear used in producing the video. While one could argue that such a description might include “too many links,” it’s done so in a way that is consistent with the channel and helpful to the viewer.
#3 You Have 5000 Characters to Play With – Use Them
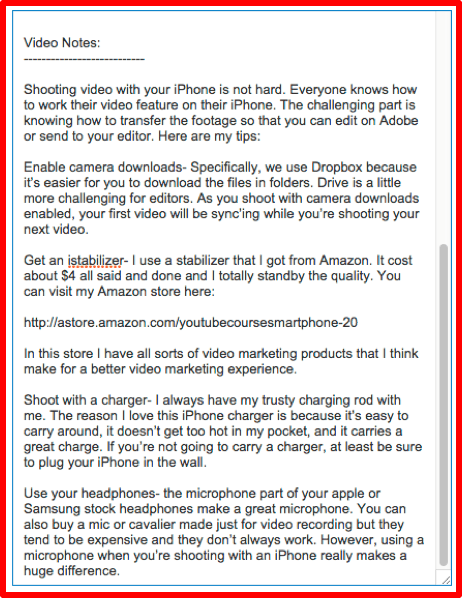
 A video page on YouTube is no different than most any other website page and has the same ability to rank on Google or YouTube. Leveraging your description box as a blog where a search engine can read it and a reader can enjoy it, will provide better results than a list of links. Many Creators will write a short blog that outlines the video and its keypoints using lots of targeted phrases, related terms, and timecode. This is especially helpful for video tutorials and videos where viewers may just need to skim the description box.
Write 100- 200 words in addition to your first 5 lines and your social media & related links. That will easily bring your word count up to 300 and show Google that you have a meaty product. Descriptions should be optimized for search so be sure to place your main keywords in the description box at 1-2% saturation. You can also use related keywords in the description to try and rank for more terms.
Sometimes we’ll even use transcriptions of the videos in the description box (we often transcribe our videos for use in captions).
A transcription can be ordered from a web- service (like Cielo24 or 3play) or freelancer/Fiverr gig. Services like this like are helpful for ranking but using them will increase your costs. Additionally, I wouldn’t just copy-pasta the whole document inside your description box. Instead, take segments of the transcription a re-write them to be read (because we don’t read the same way we speak). You can add time code to the transcription as well and YouTube will convert that number into a clickable link that goes right to that section in the video. It’s pretty cool.
#4 Create Profiles in TubeBuddy
TubeBuddy is a browser extension (although it’s not available for Chrome right now) that can be added to any browser for free. Filled with tons of advanced options. Tubebuddy also has a profile feature for YouTube that allows Creators to set up different upload defaults for different profiles. This is perfect for Creators who are making different types of shows or series’ with different optimization needs. Once installed, choose the free or the paid option and navigate to your Upload Defaults section on the left hand side of the Creator Studio.
From here, you can begin to type in your profile-specific defaults one profile at a time. Be sure to think through this process since you don’t want to create more work than what is necessary to be successful. Once completed simply click NEW on the TubeBuddy extension in the upper right corner of the page and you’re done! Just rinse and repeat for more profiles. At Videospot, we have a new profile for each series that we produce.
#5 Create Templates in Upload Defaults.
Now that your profiles are set up you can create upload defaults for each new video. With an upload default, the optimization fields in the upload section will auto-fill with pre-written content. This makes optimization a breeze! Both Creator Studio & TubeBuddy allow you to input a template description box, title, and tags (Tubebuddy allows for multiple profiles and therefore multiple upload defaults- it’s seriously a must-have tool for Creators). While it’s never recommended to use an identical description for every video, you should have a consistent branded effort behind every description.
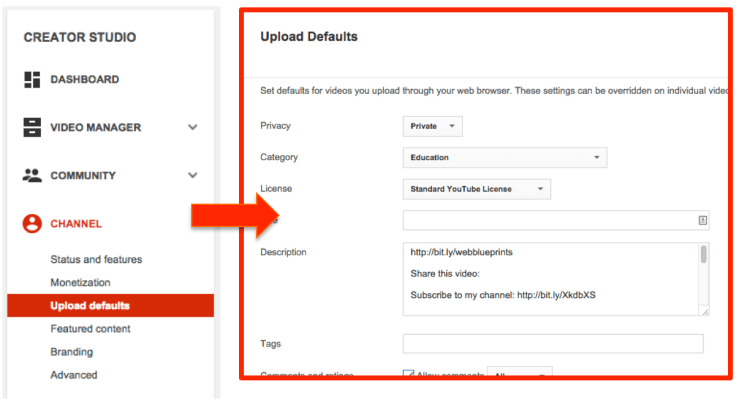
Create a template with your format, links, and other copy that you will use in every video to save time. In YouTube, you would simply navigate to Creator Studio > Channel > Upload Defaults.

Best Practice for Creating YouTube Descriptions
I often have clients tell me that their videos are “different” or that their audience “doesn’t read” description boxes and so forth. It’s also common for these videos to have relatively small view counts and low subscriber rates. Generally speaking, we follow this template for writing description boxes:
- First 5 lines
- Include link to optin
- Brief teaser for video content*
- Contact and Social Links
- Longer Description*
- References mentioned in video*
- Link to blog
*These items will change for every video.
The fact is that every Creator needs to be using the description box every time. Don’t skip this pivotal step because of the work involved. If you’re pre-planning your video production it helps to write out your description text before you shoot so you’ve got a shooting guideline and text to input when you’re ready to upload. YouTube is all about mastering little workflows. Add a description box workflow to your video production and you’ll start to see increased results across all your channels.